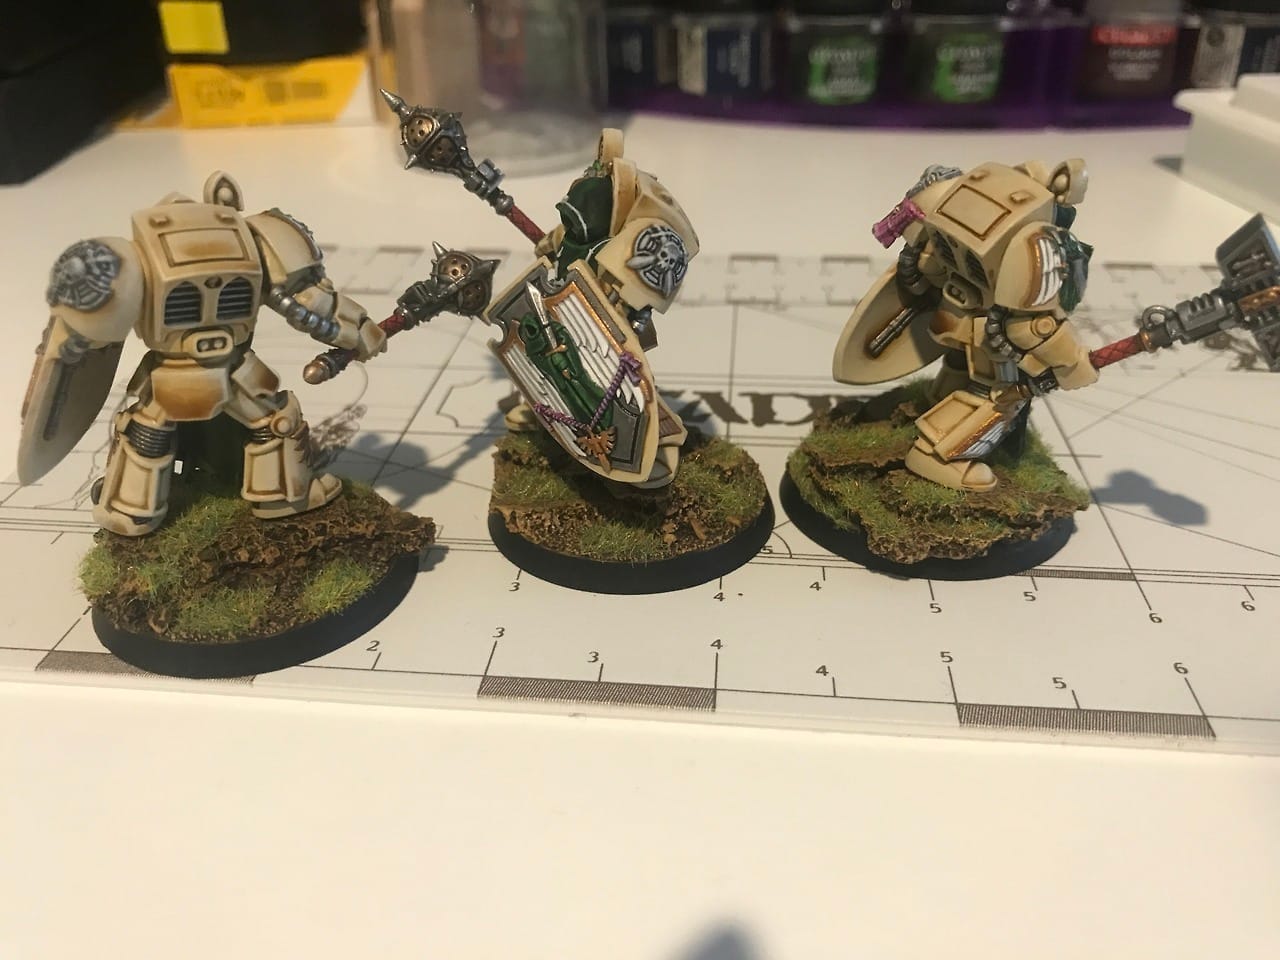
Deathwing Knights

Its been too long since my last update. Although now I have painted a few models recently. I thought I would post a painting tutorial for my Deathwing Knights since I have completed a few of them now.
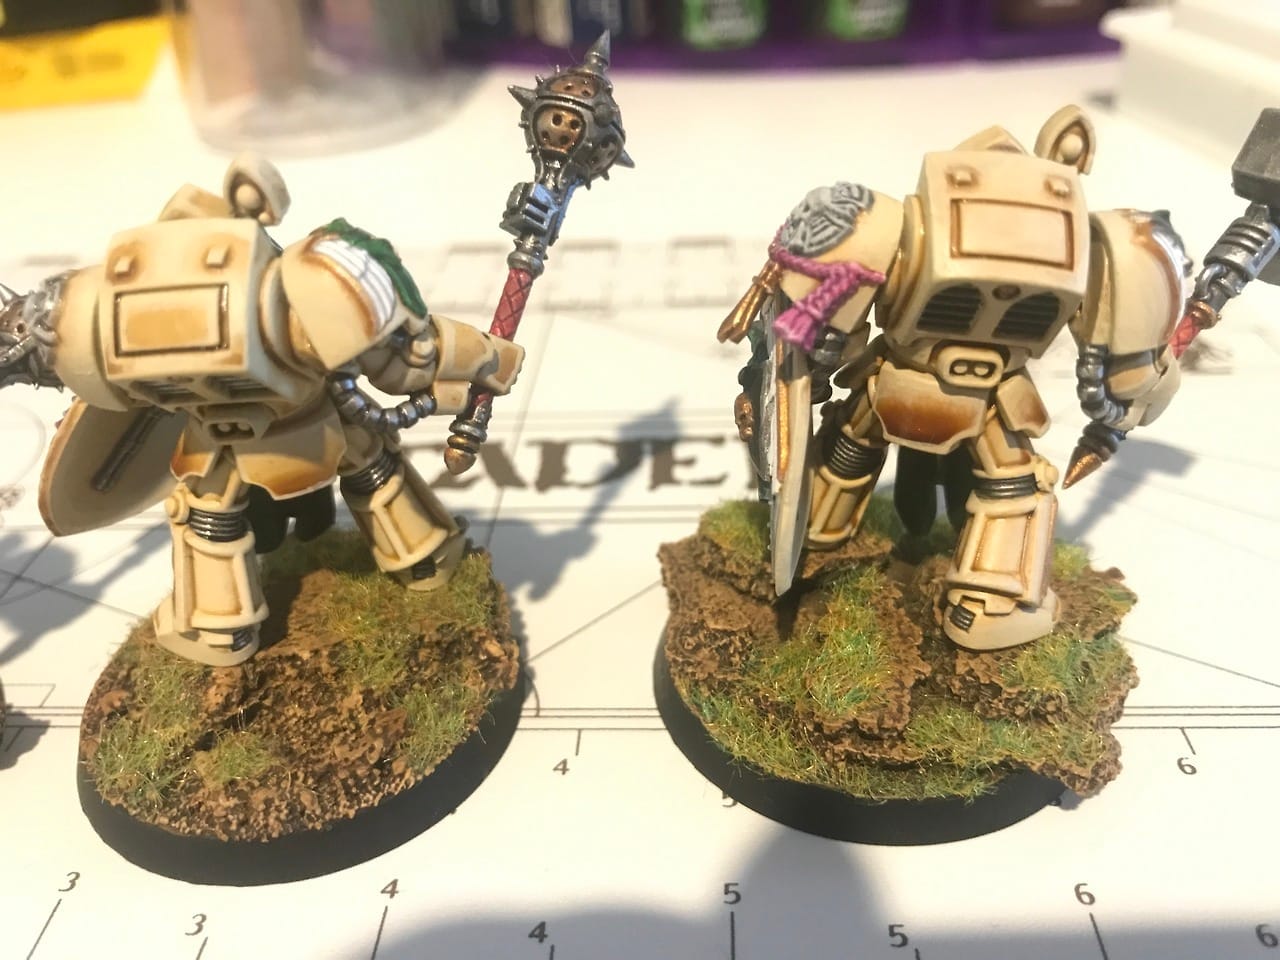
Each knight took me approximately 15 hours to paint. I do them individually from start to finish because they are too detailed in my opinion to production line. Although its up to you how you want to tackle them.
The bases are made from some layers of 3mm tick cork sheet that i tore to size and glued down. Then normal flocking and basing on top.
Should be noted I did not glue the arms to the torso or the torso to the legs until after painting was complete.
Step 1 - White basecoat
Step 2 - Paint armor with a smooth coat of Ushabti Bone.
Step 3 - Wash the armor with a fair liberal coat of Seraphim Sepia. Pay attention to the drying angle and the flow direction on large armor panels like the butt. You may need to prop the models in the right angle for an extended period of time to wait for the wash to dry, as you can see I used a pretty thick coat of the wash in places to achieve the effect.
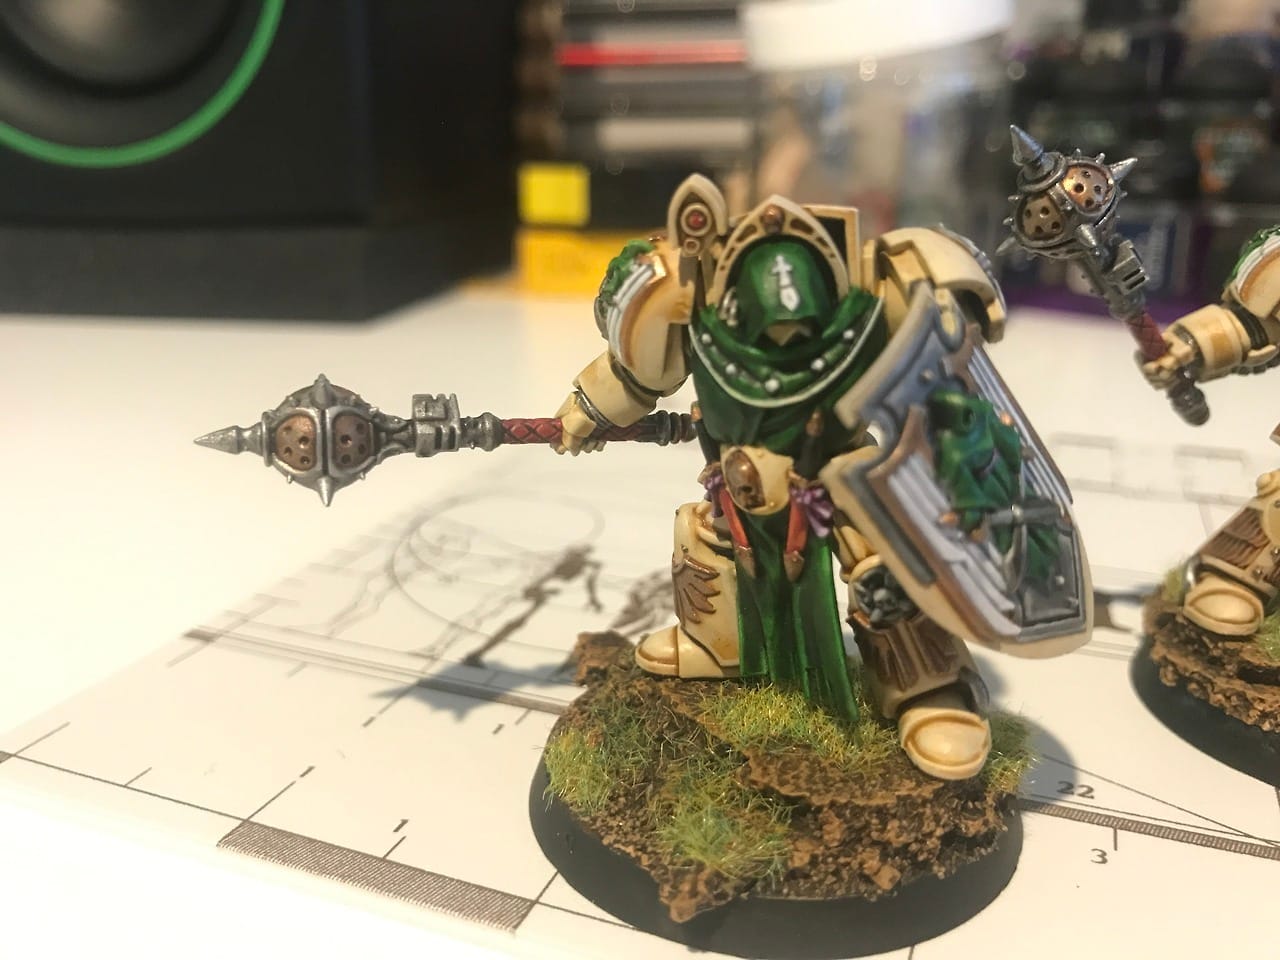
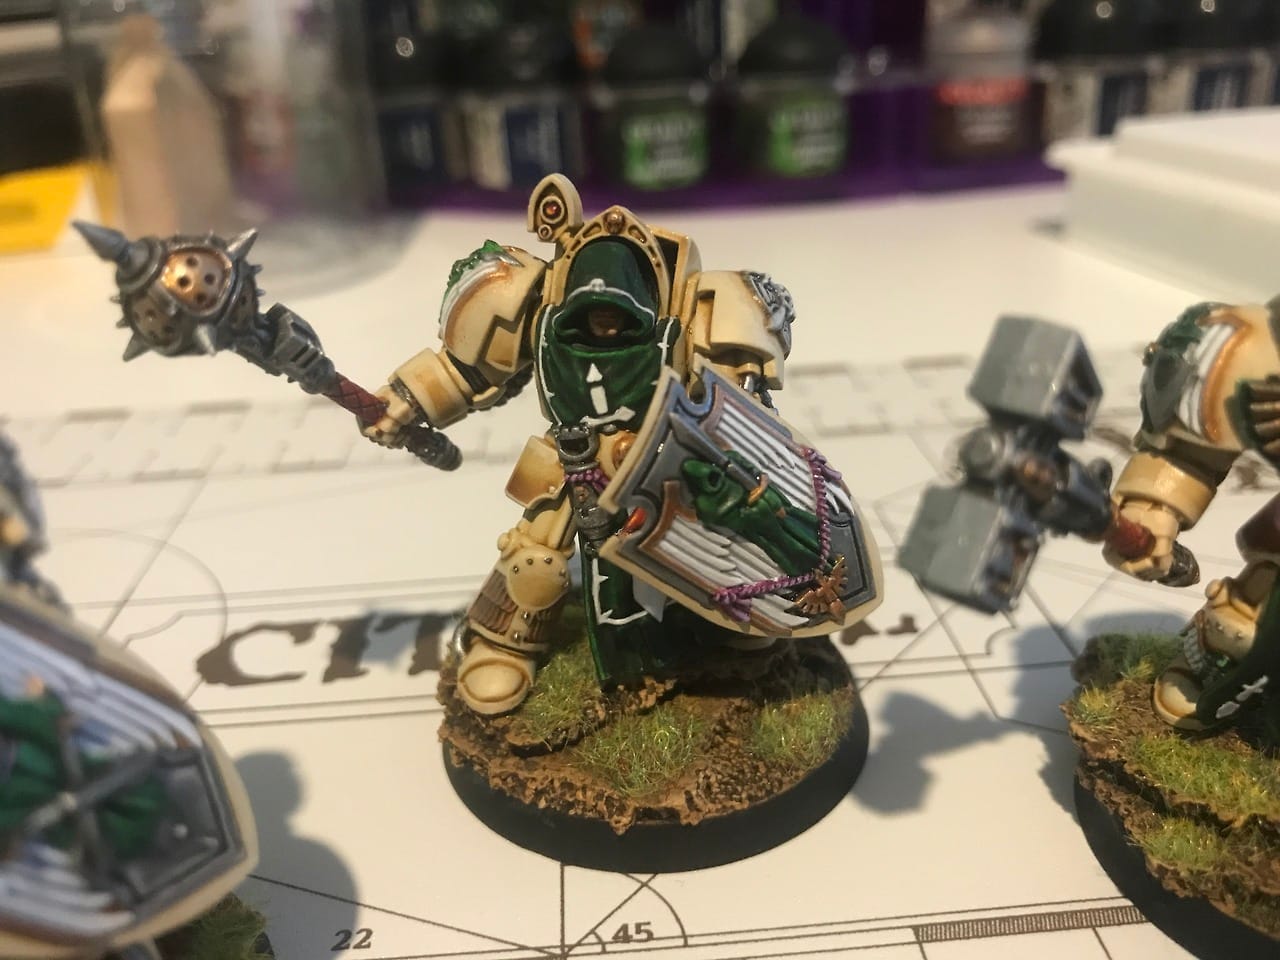
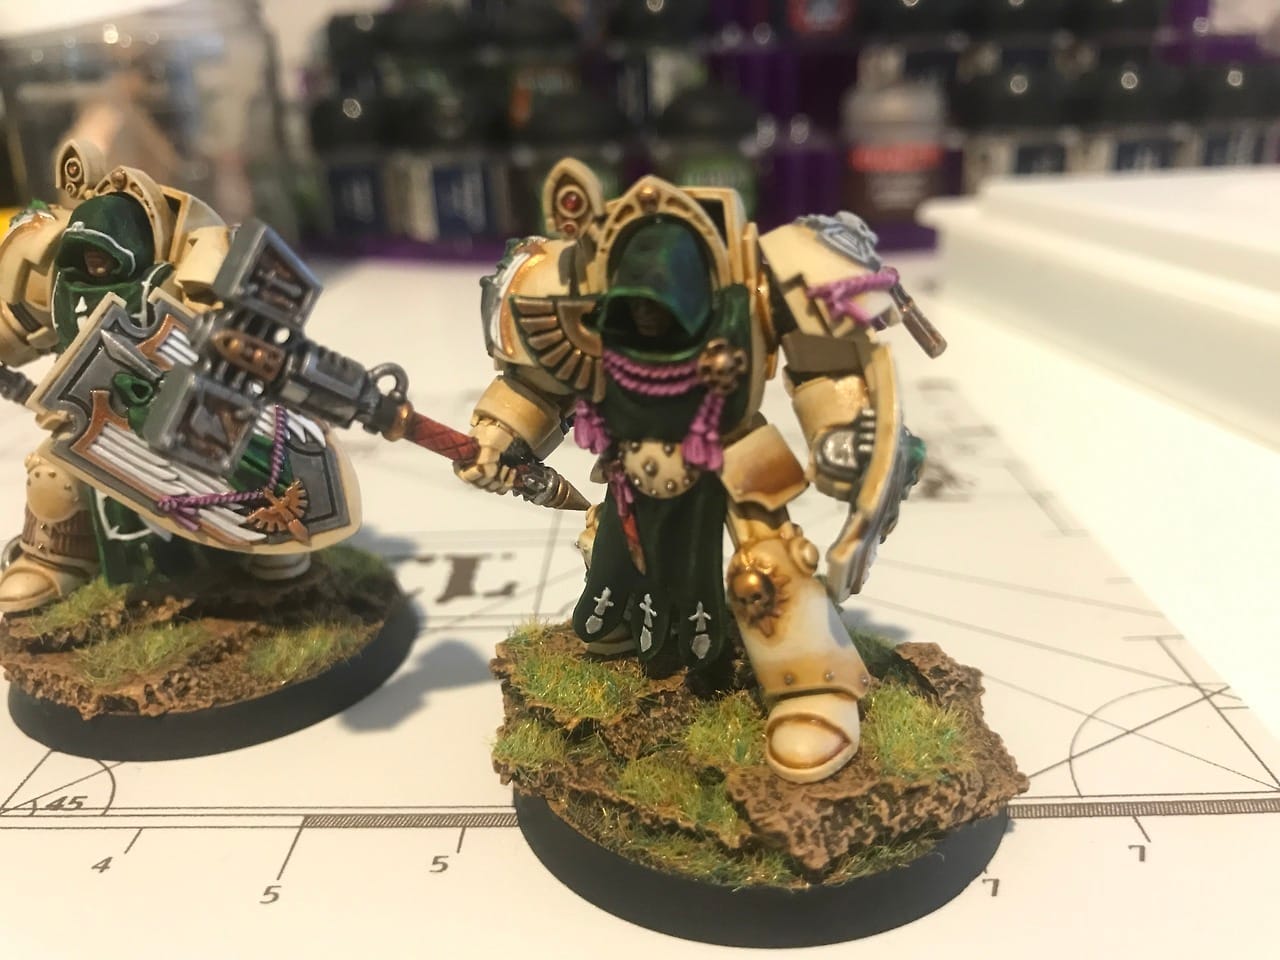
Step 4 - Paint base coats for everything except the green robes. Scab red for handles, lenses and knife sheathes. leadbelcher for everything metal silver, balthazar gold for everything gold, codex grey for the shield, angel wings and shoulder detail. Liche purple for ropes.
Step 5 - Use Nuln oil to lightly shade everything grey or silver. Use Agrax earthshade to wash red and gold
Step 6 - Wash the (still white) robes with a light coat of Nuln Oil. Dont forget the robes of the figure on the shield and shoulder insignia. We are pre-shading these.
Step 7 - Begin cleaning up the armor by re-painting the Ushabti bone, leaving seraphim sepia wash in the crevices and where shadows would falls. This process takes a while and should be done carefully with thin watered down paint. Multiple coats are far better than one thick coat. Highlight the armor with screaming skull mixed with ushabti bone and work to pure screaming skull.
Step 8 - Paint the robes with Biel-tan green. This is a green shade wash and should blend really well because of the pre-shading we did using the white base with Nuln oil. Once this is dry you may need to do another coat. I experimented with a further coat of waywatcher green glaze to assist with the blending.
Step 9 - Paint any white details on the robes with a few thin coats of fortress grey, followed by light coats of ceramite white, leaving some of the grey visible for depth. The same process can be done for wings on any angels on shoulders and shields.
Step 10 - Highlight silver with chainmail and gold with shining gold followed by gehnna’s gold. If necessary carefully reapply the Nuln oil or Agrax earthshade washes in the deep points and cracks.
Step 11 - Final details like highlights on red things like the handles and knife sheathes, purple ropes, grey details on the shoulder and shield, and lenses should be pretty self explanatory. Use a small brush and highlight with progressively lighter shades of the appropriate color or the base color mixed with white. Thin your paints. If you mess up a bit, re-paint the wash layer carefully and fix your mistakes as you go.